Updating Your XIMI Unit
The following instructions are for updating your XIMI unit.
| Things you will need |
|---|
| Your computer (any operating system) |
| Micro SD Card Reader (To USB) |
| Download the latest XIMI software here |
| Download BalenaEtcher to help you install the software onto the micro SD card |
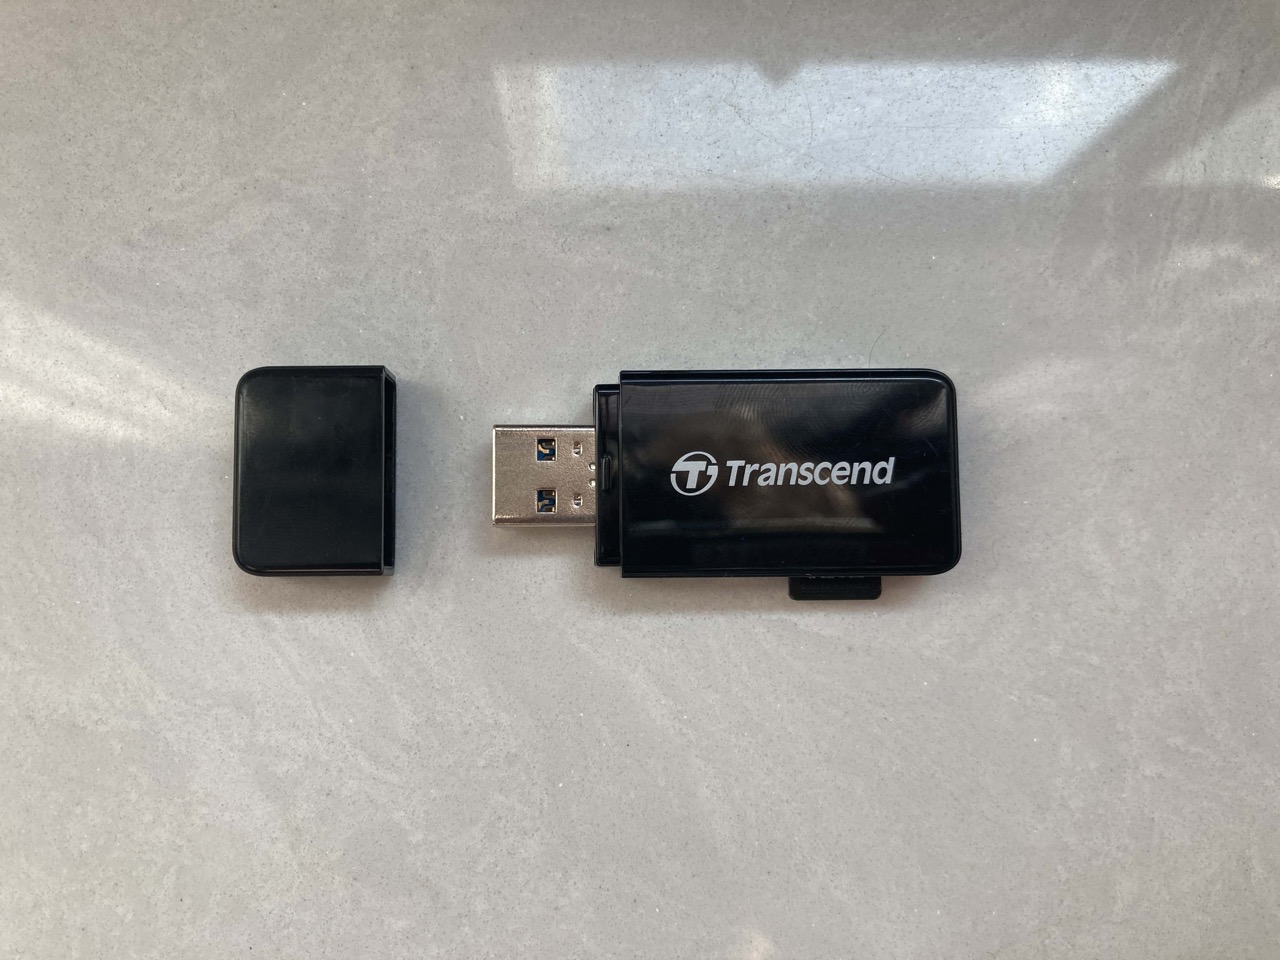
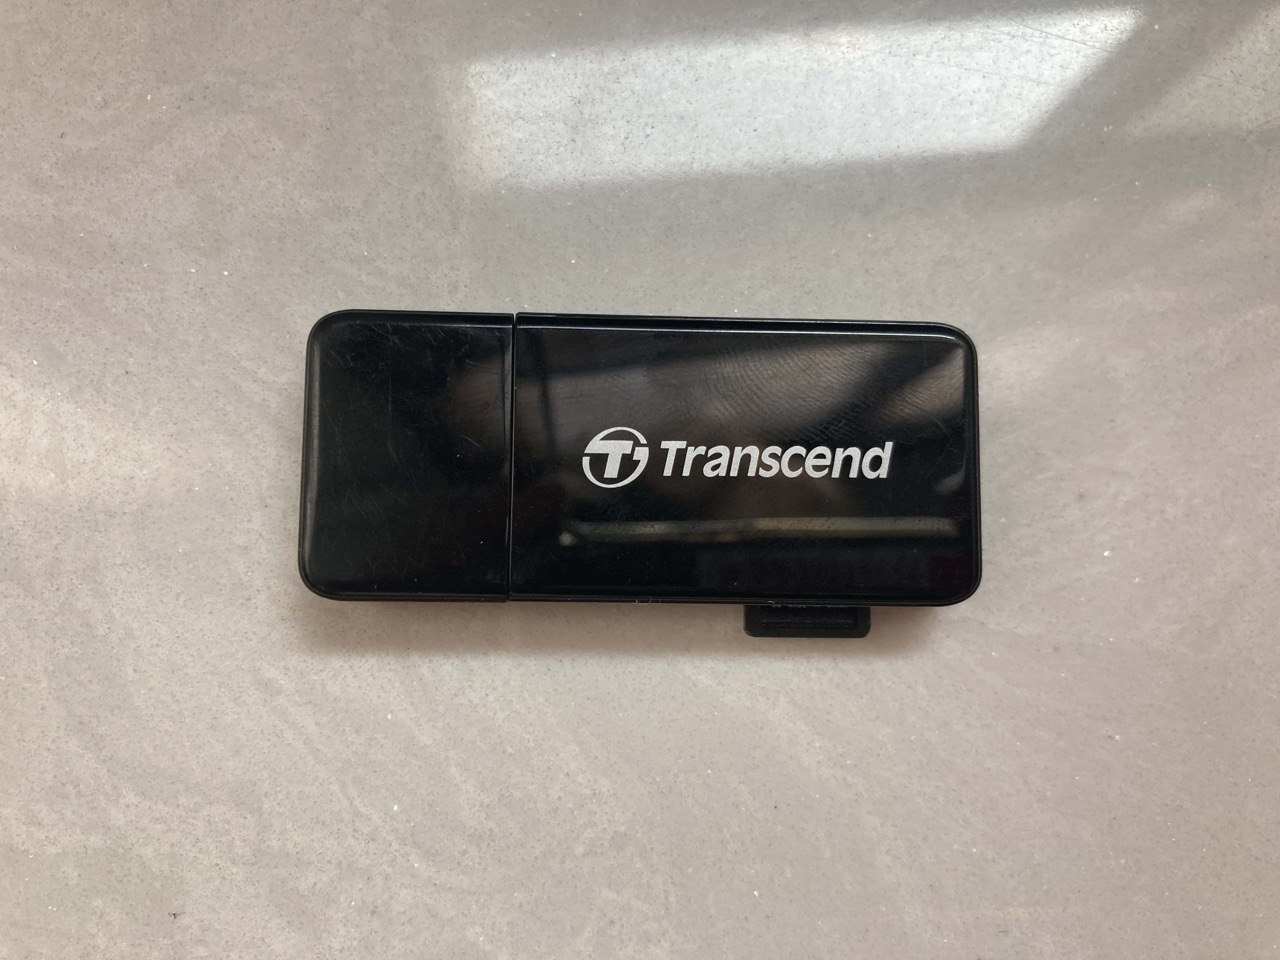
Here is an example of how a Micro SD Card Reader looks like
Removing the SD card from XIMI Unit#
Important!
Before you begin updating the XIMI unit, ensure that the unit is shutdown fully and detach the unit from any power sources.
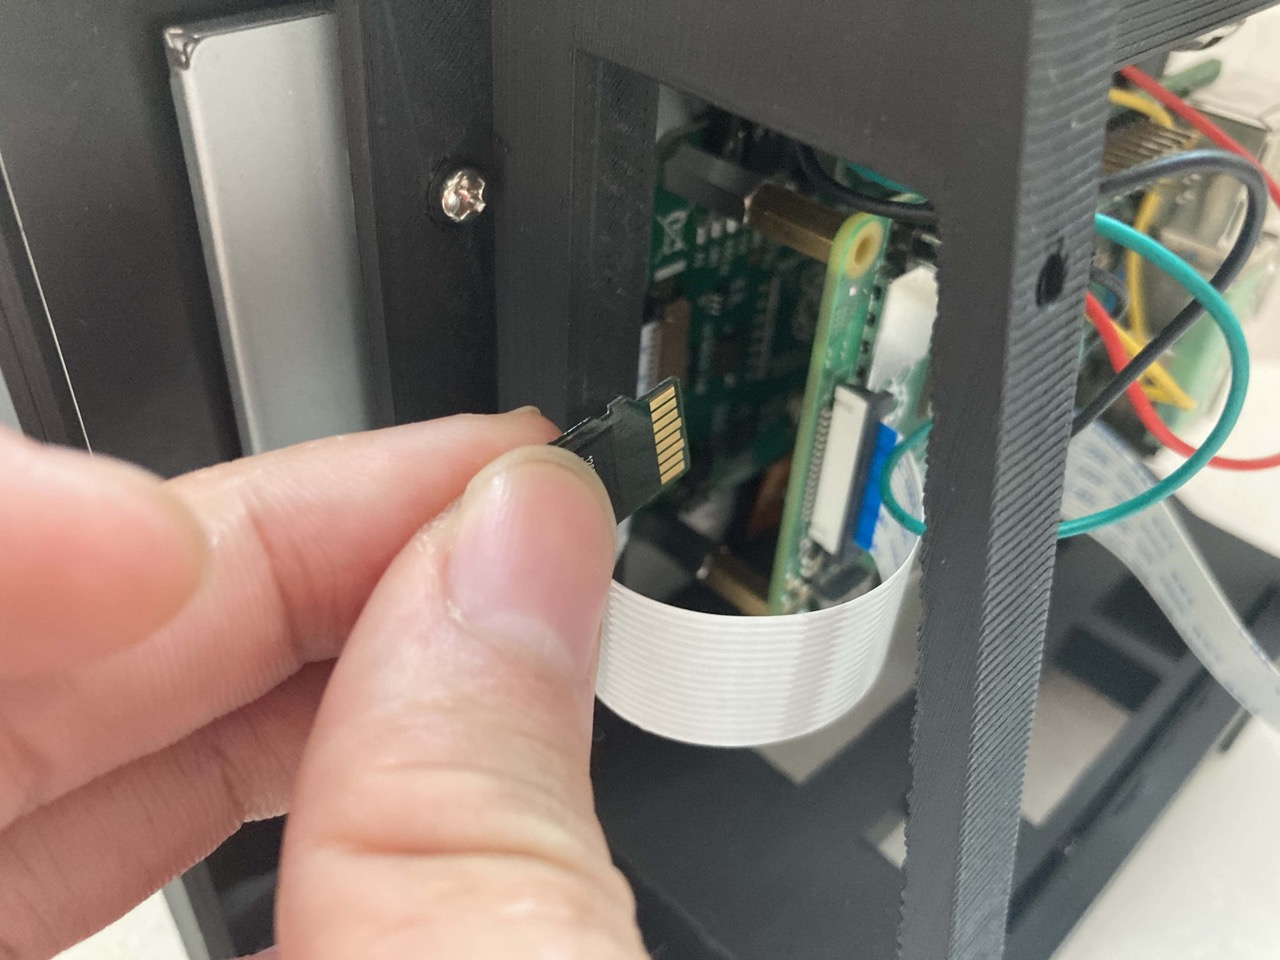
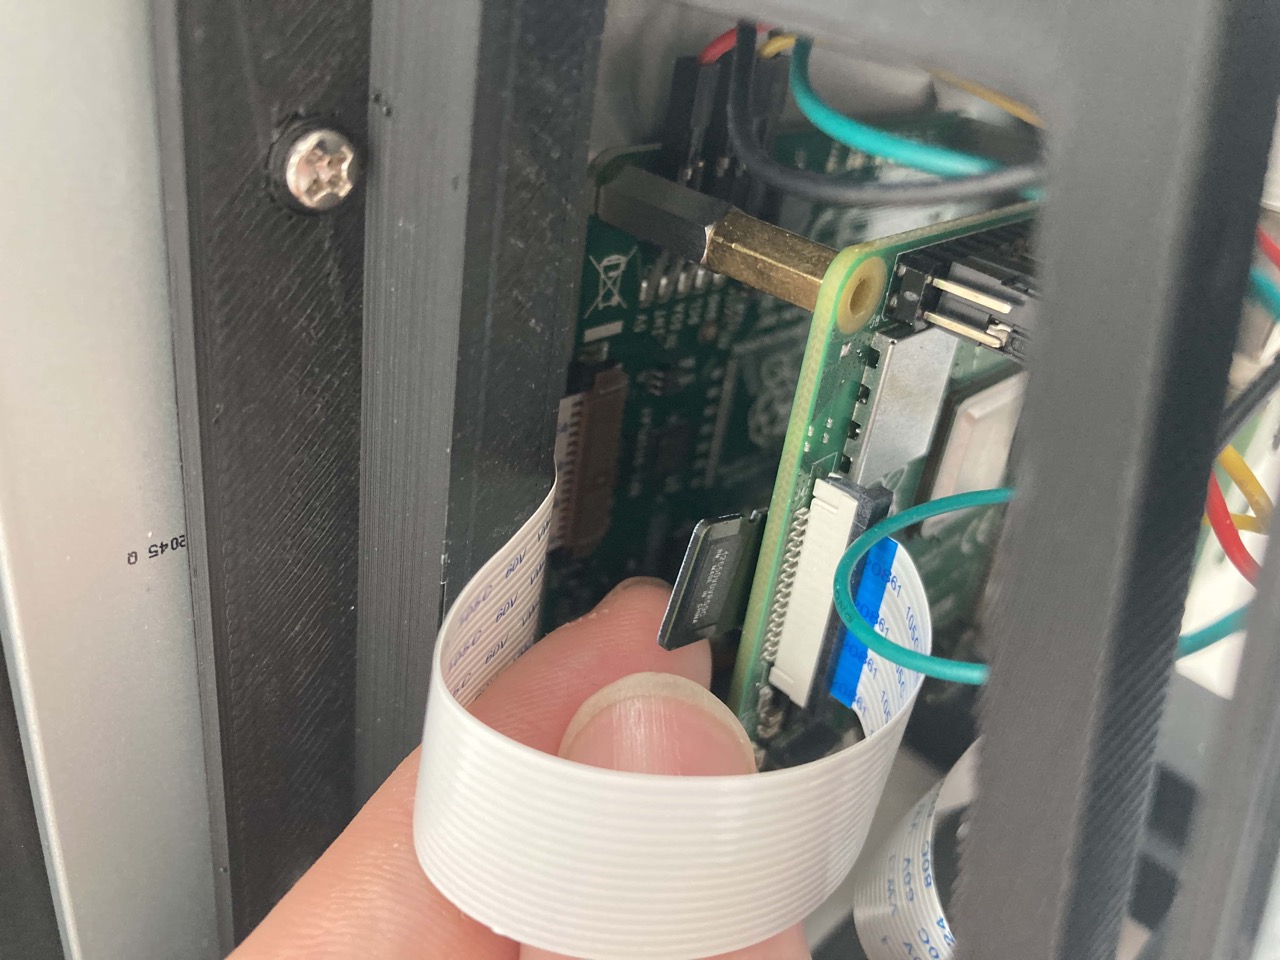
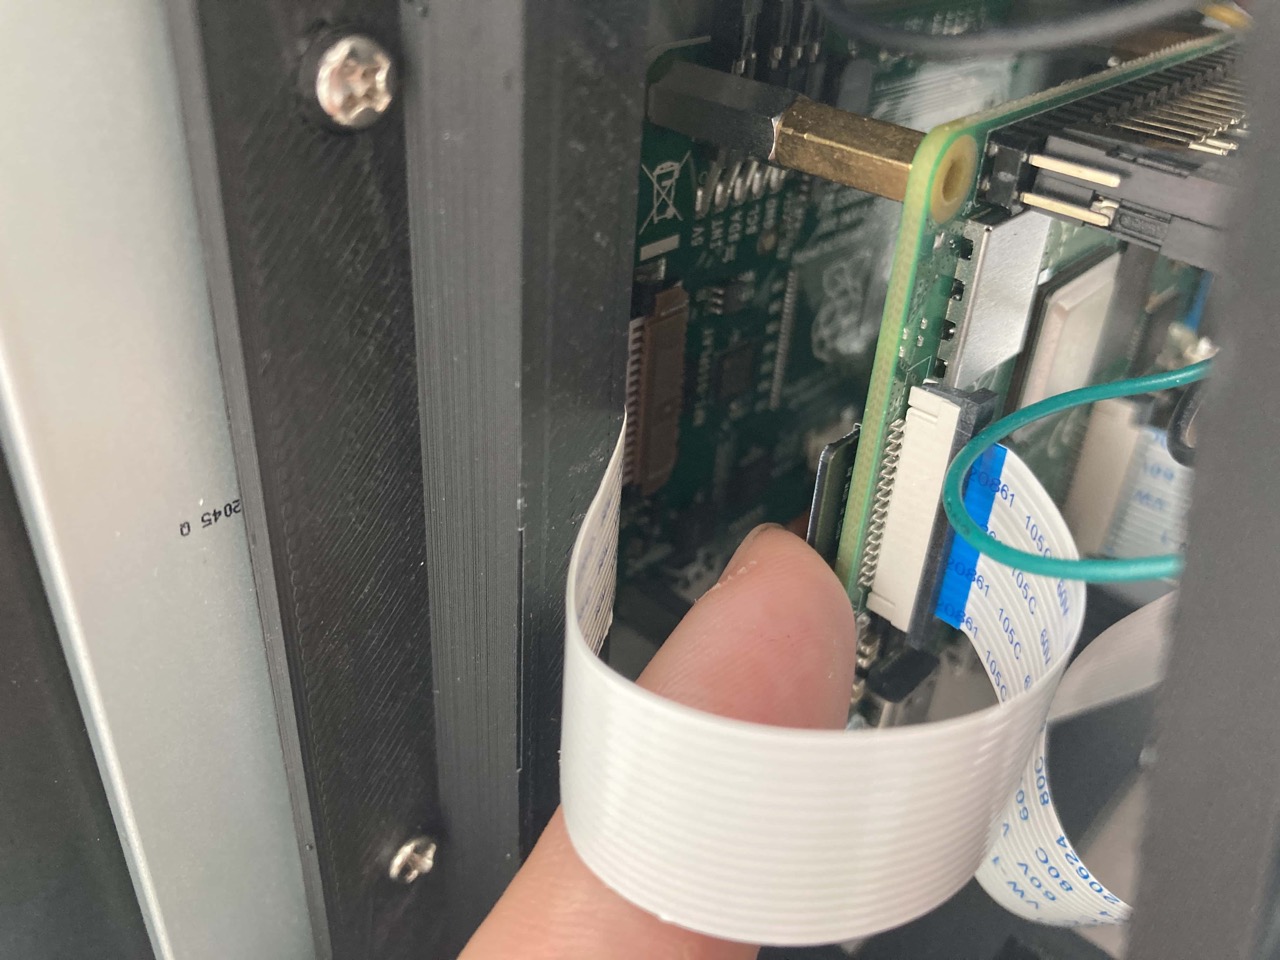
Turn the XIMI unit to the back. On the right of the unit, you should see an opening that allows you to access the electronics.
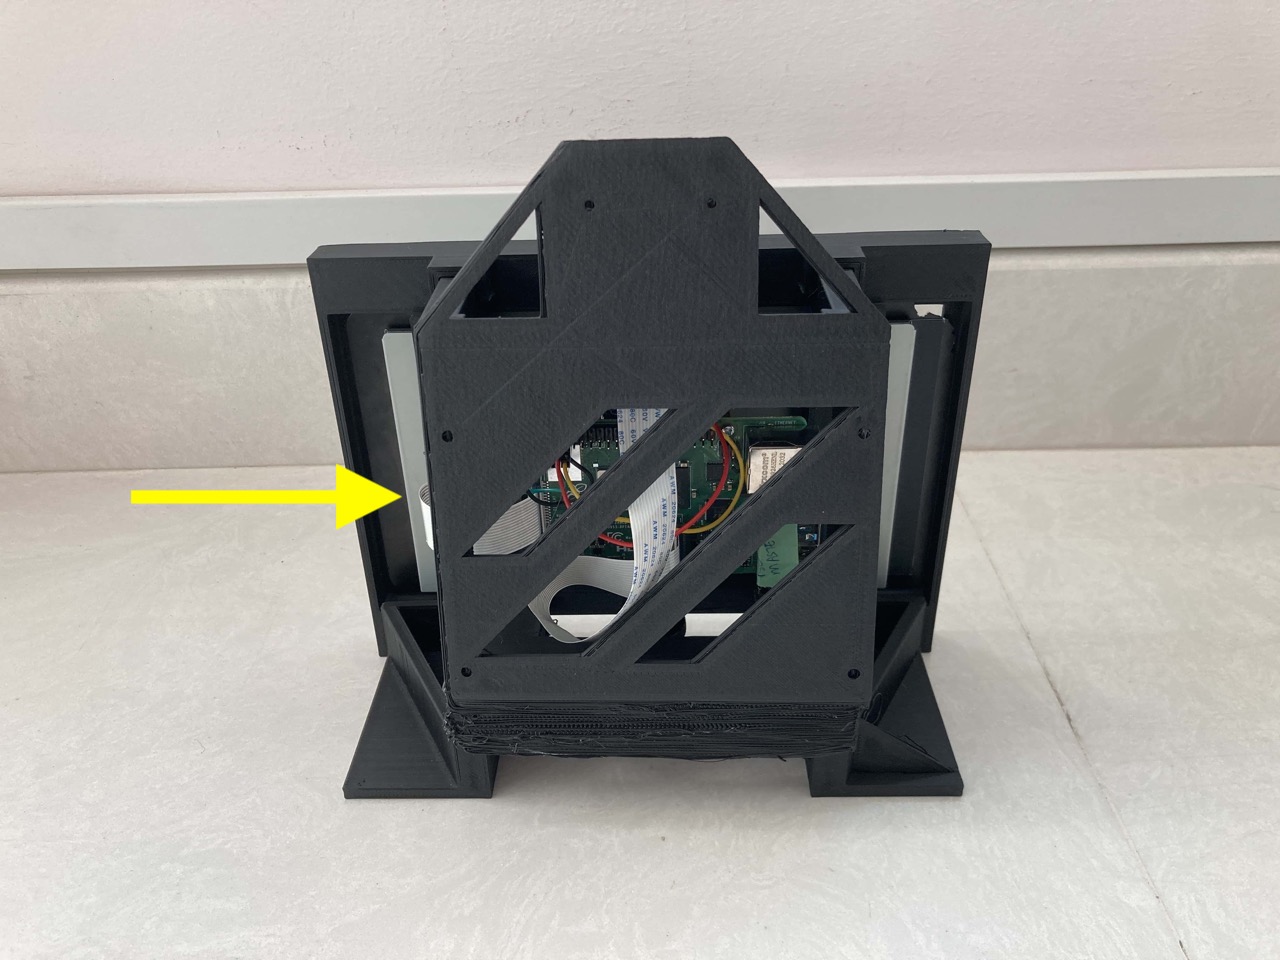
Upon closer inspection, you should see a micro SD card on the back of the board, directly behind the ribbon cable port.
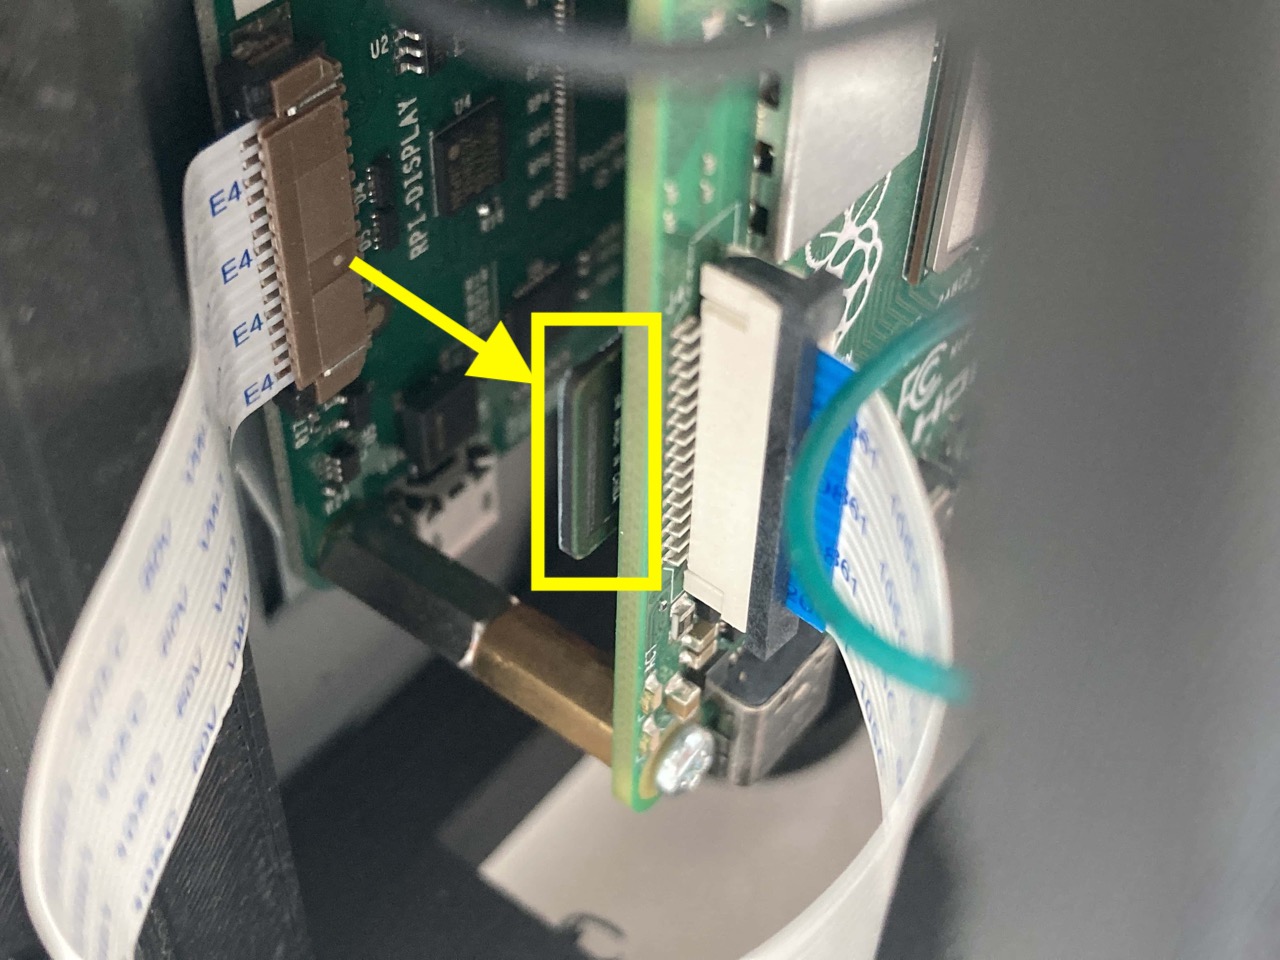
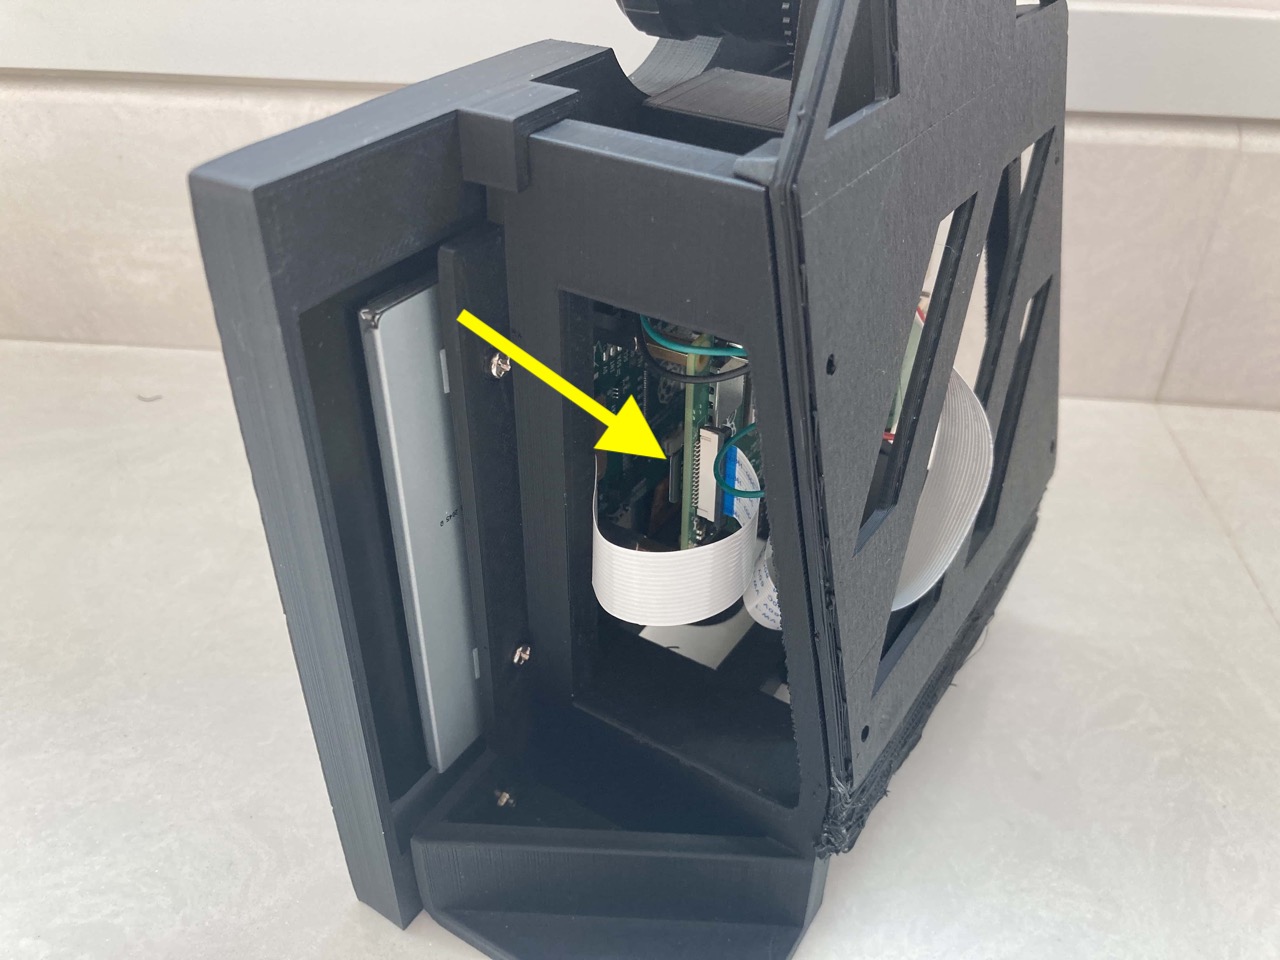
Gently remove the SD card by pulling it out of the port. You may want to wiggle it a bit before attempting to remove it. Do be careful not to damage the ribbon cable.

Using the Reader#
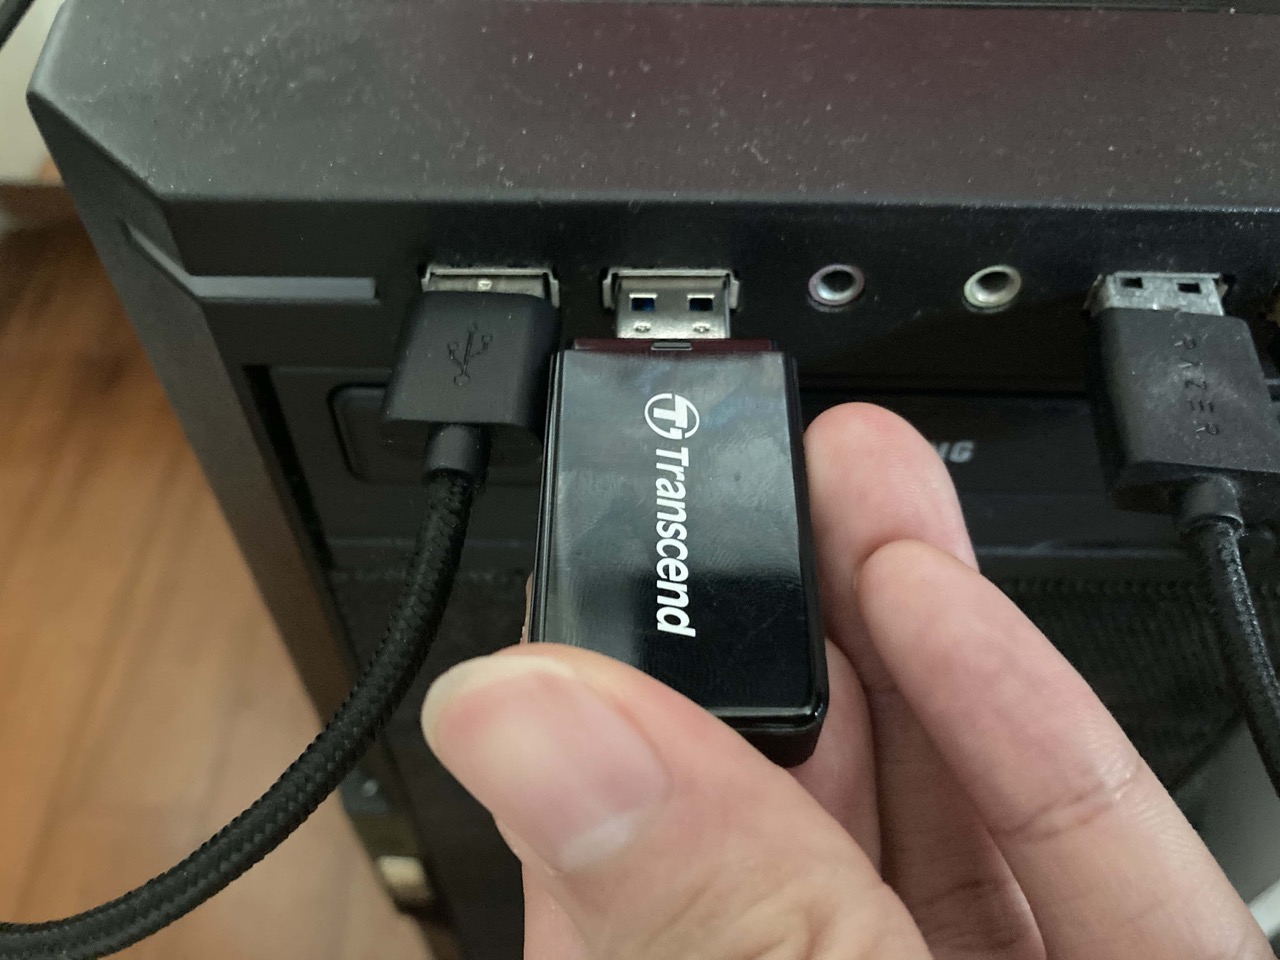
Insert the micro SD card into the port as shown below.
Important!
Do not force the SD card into the port as it may cause damage. If you have trouble inserting the card into the port, check if the orientation is correct first as the card reader in the image may not be the same as yours.

Once that is done, insert the reader into your computer. Your computer should be able to read it.
Using BalenaEtcher#
BalenaEtcher is a tool that you can use to flash SD cards. Download the program before you begin. You should also have the latest XIMI software downloaded onto your computer.
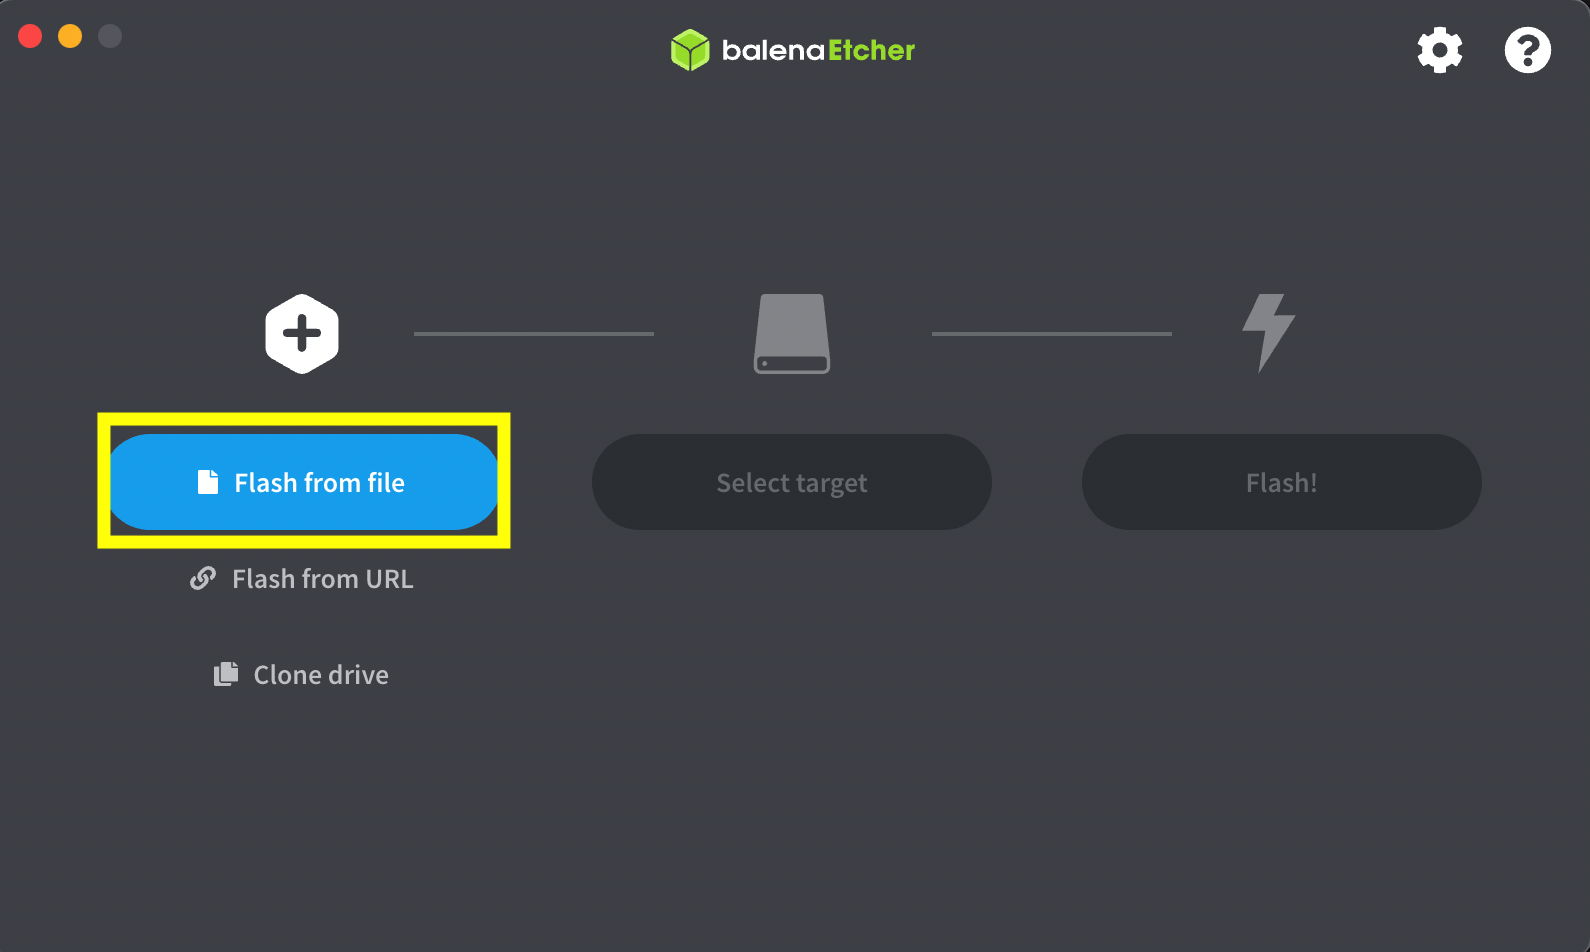
Launching the program, this is what you will see.
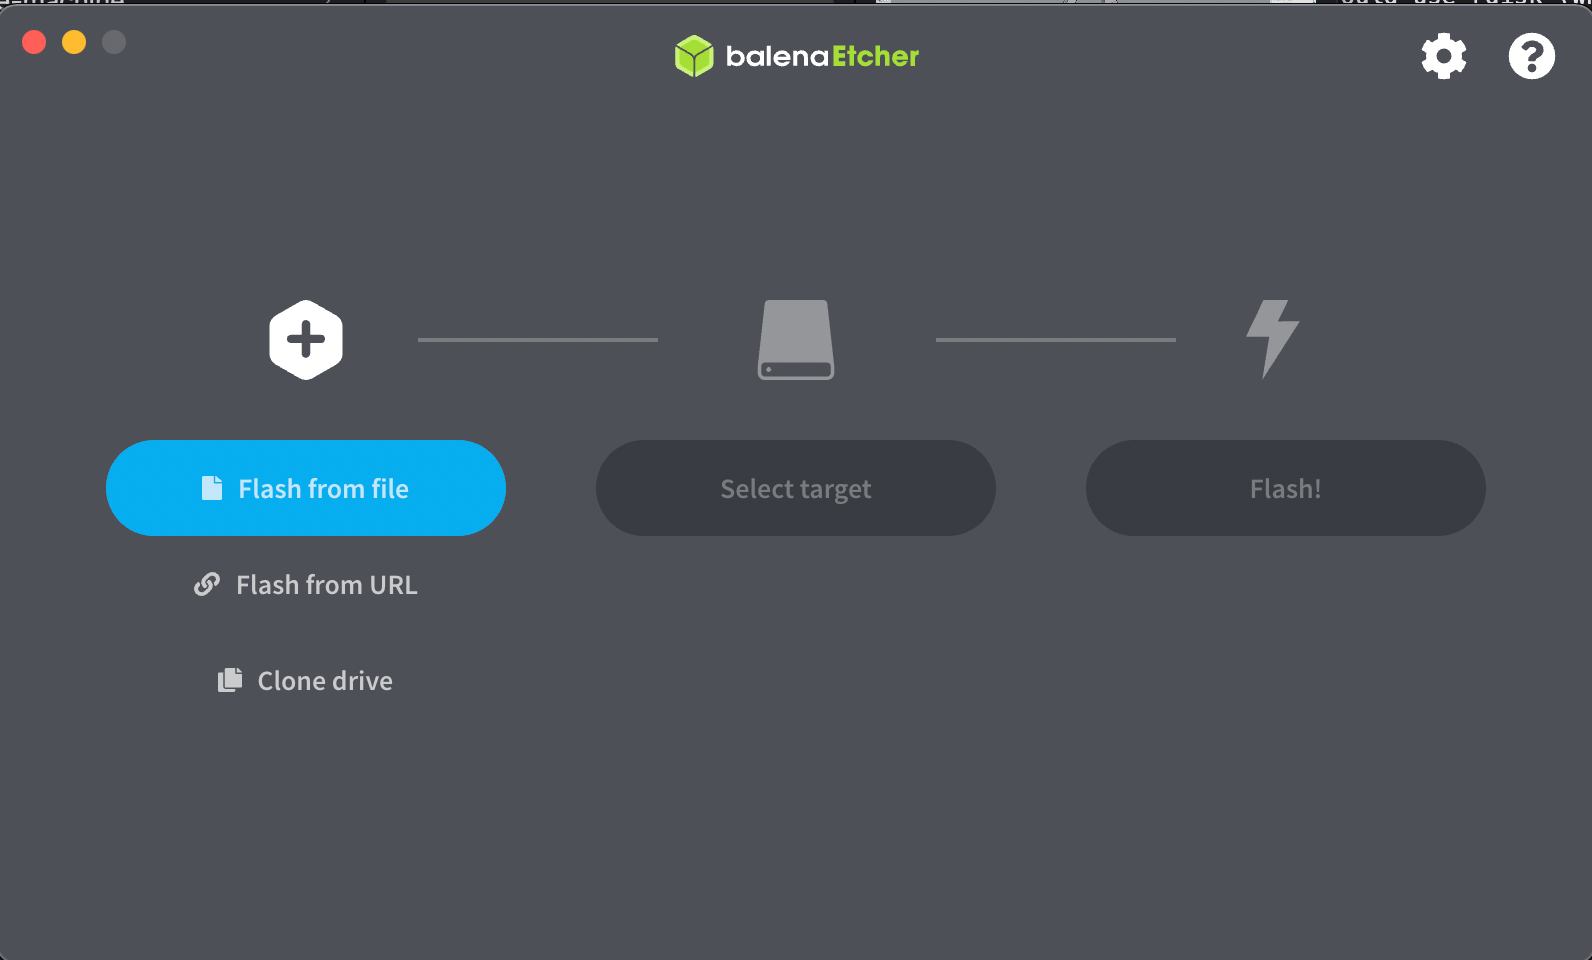
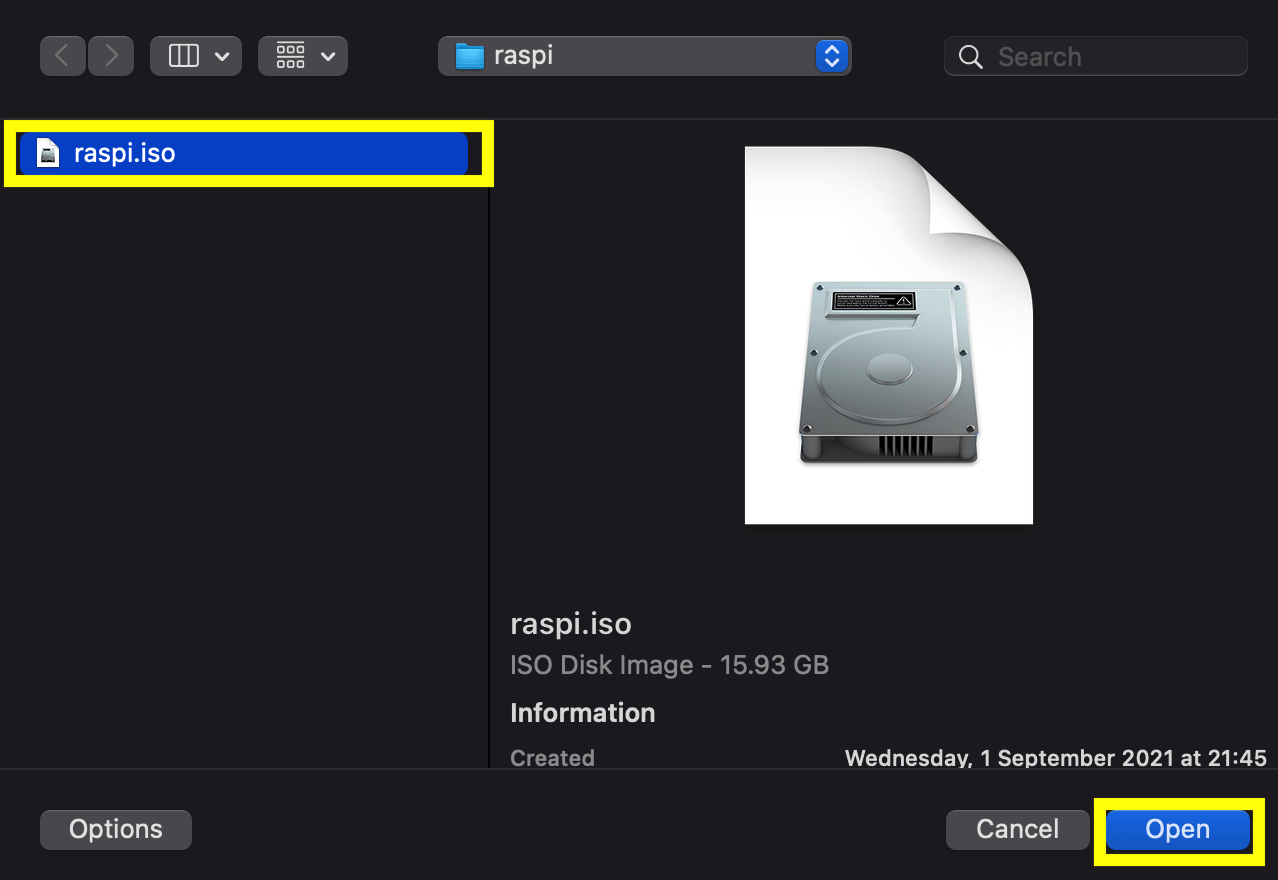
Click Flash from file and select the downloaded XIMI software file which should be a .iso file. (The below image uses raspi.iso as an example)
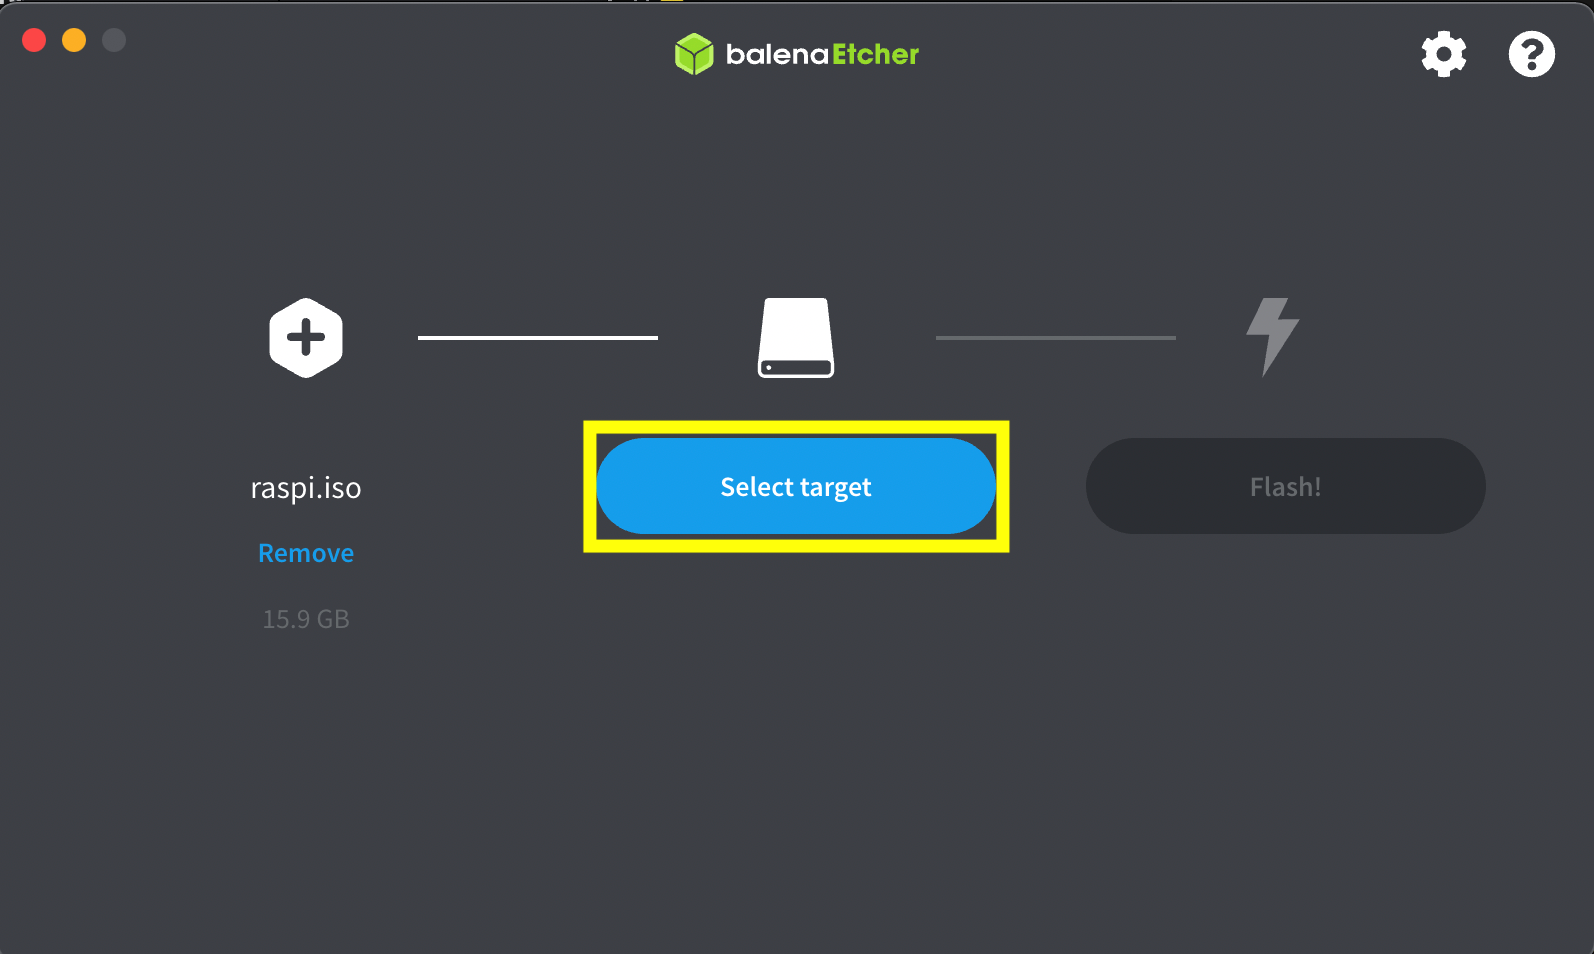
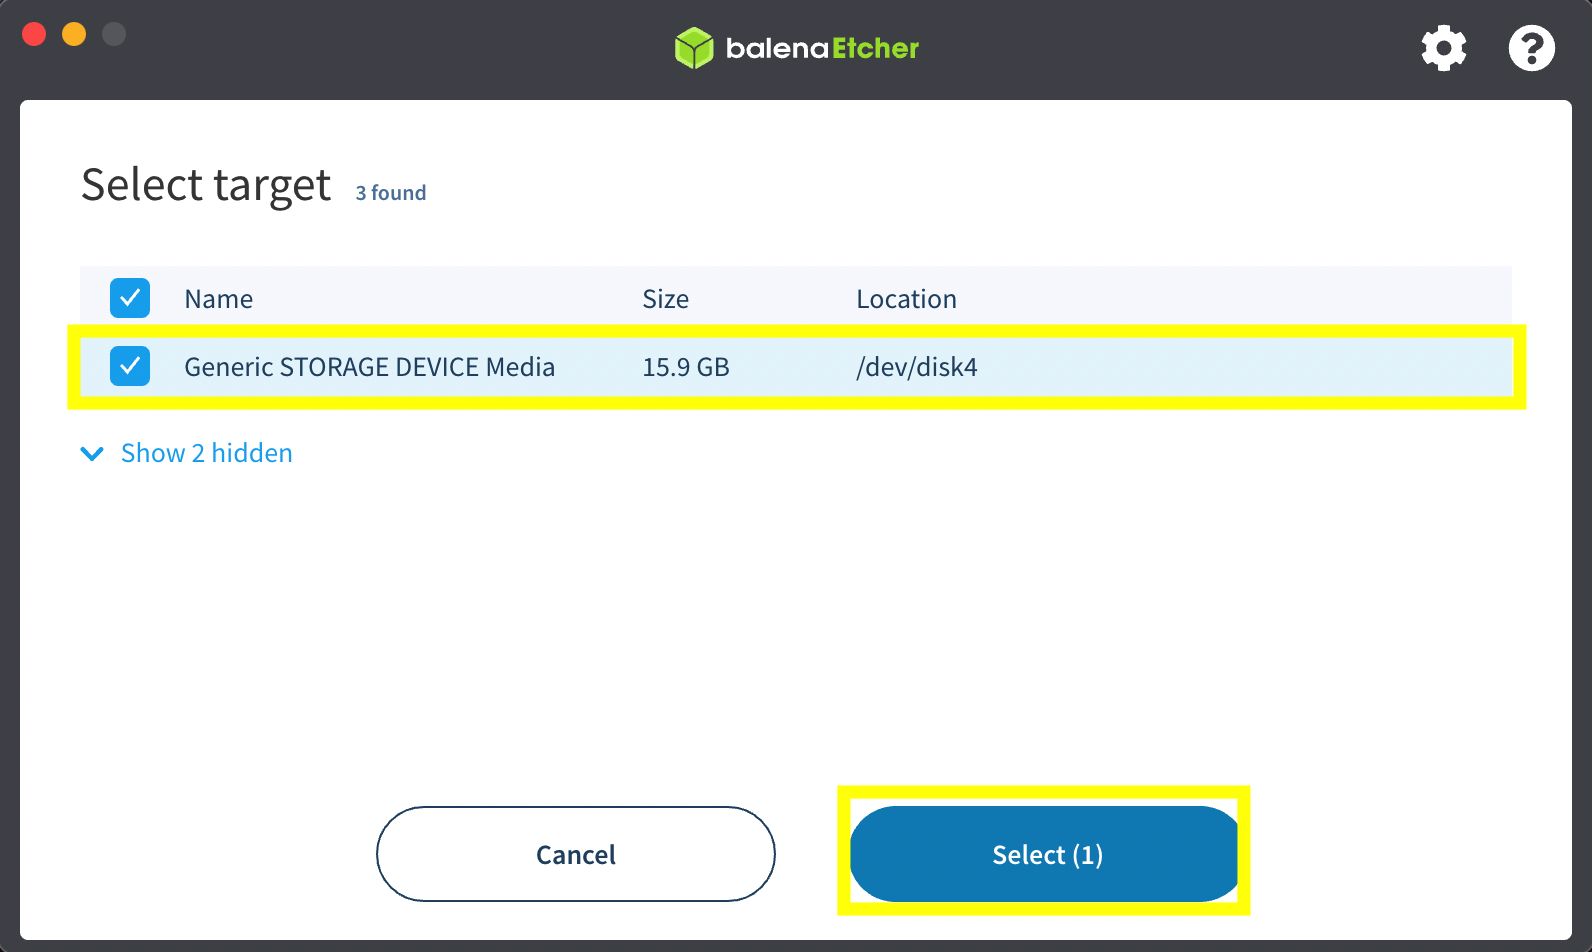
Next, select the target drive, which is the micro SD card named Generic STORAGE DEVICE Media. (Side note: This should be renamed for users to better identify the device)
DANGER
Check that you have selected the correct drives. Failing to do so may overwrite your computer's disk.
Click Select (1) to continue.
Finally, click Flash! to begin flashing.

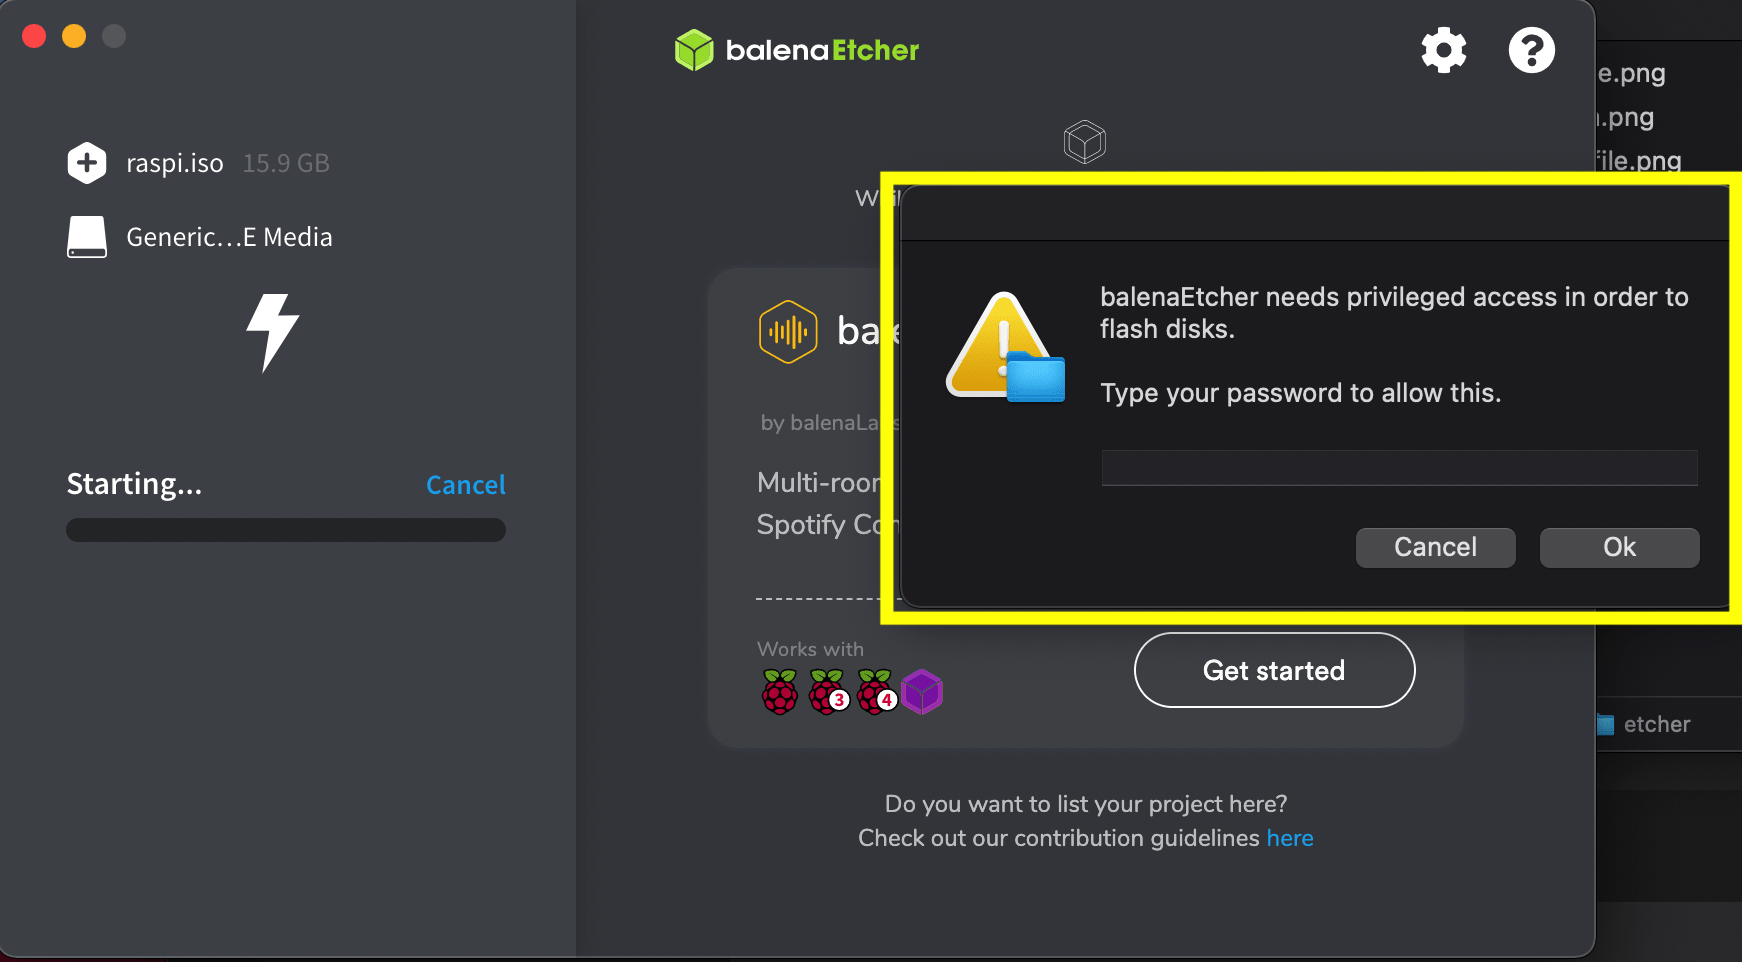
Enter your computer's administrative password and allow the program to use the drive, if prompted. (image below is just an example)
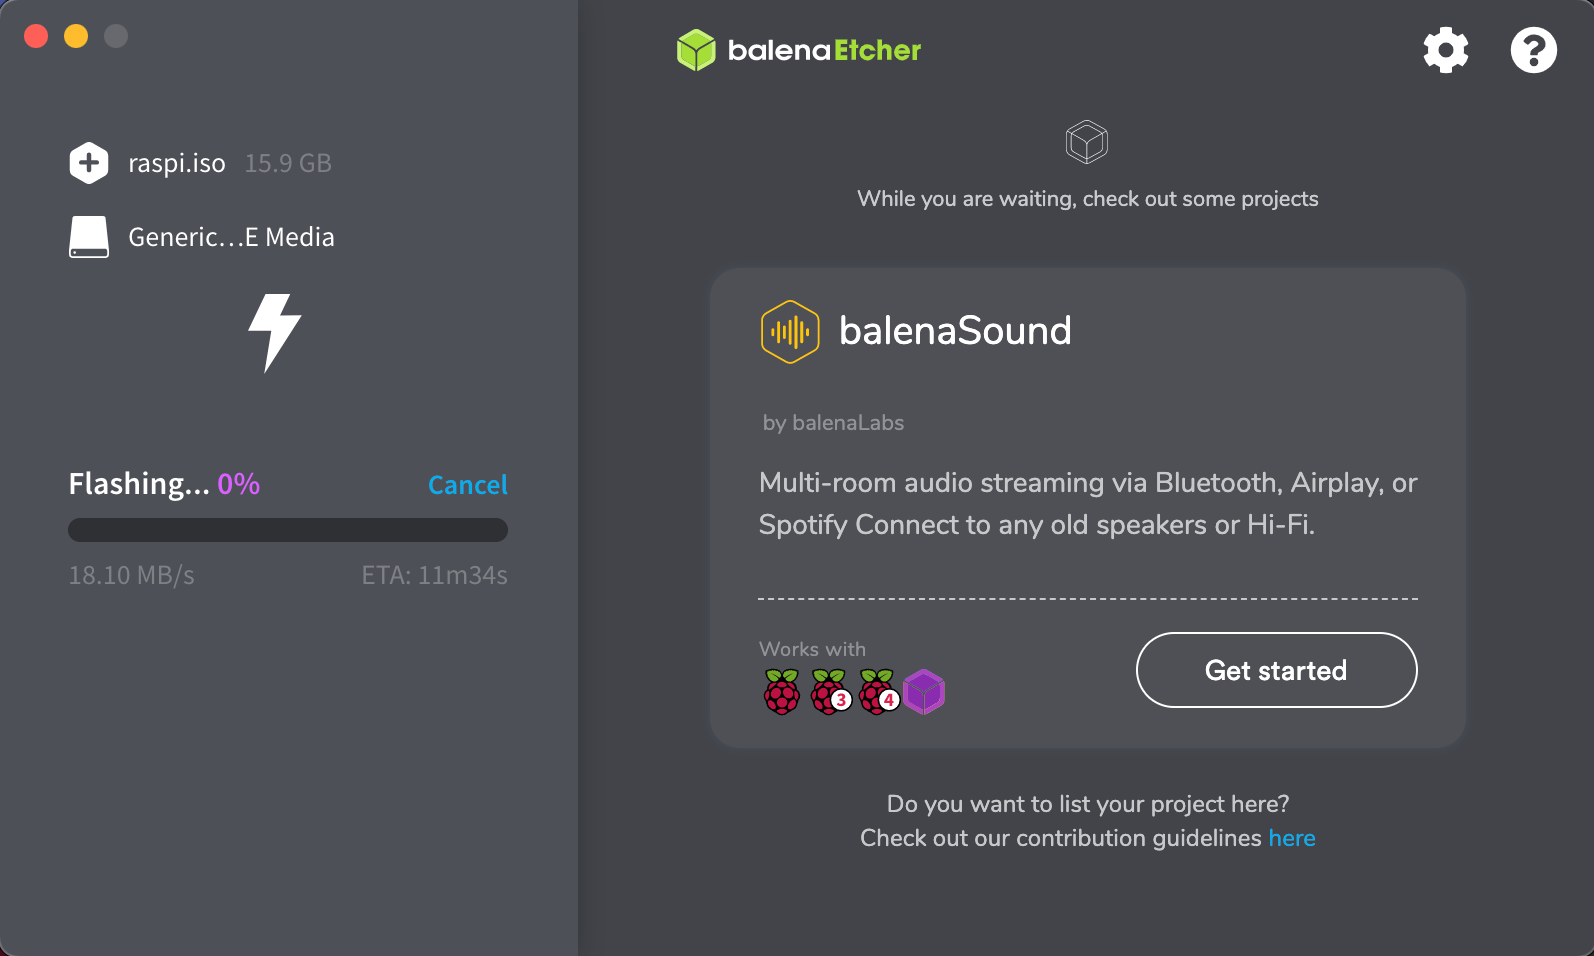
The flashing will begin. It will take a few minutes. Go grab a drink!
Once it's done, you can close the program. Unmount and remove the micro SD card reader from your computer.

Re-inserting The Micro SD Card#
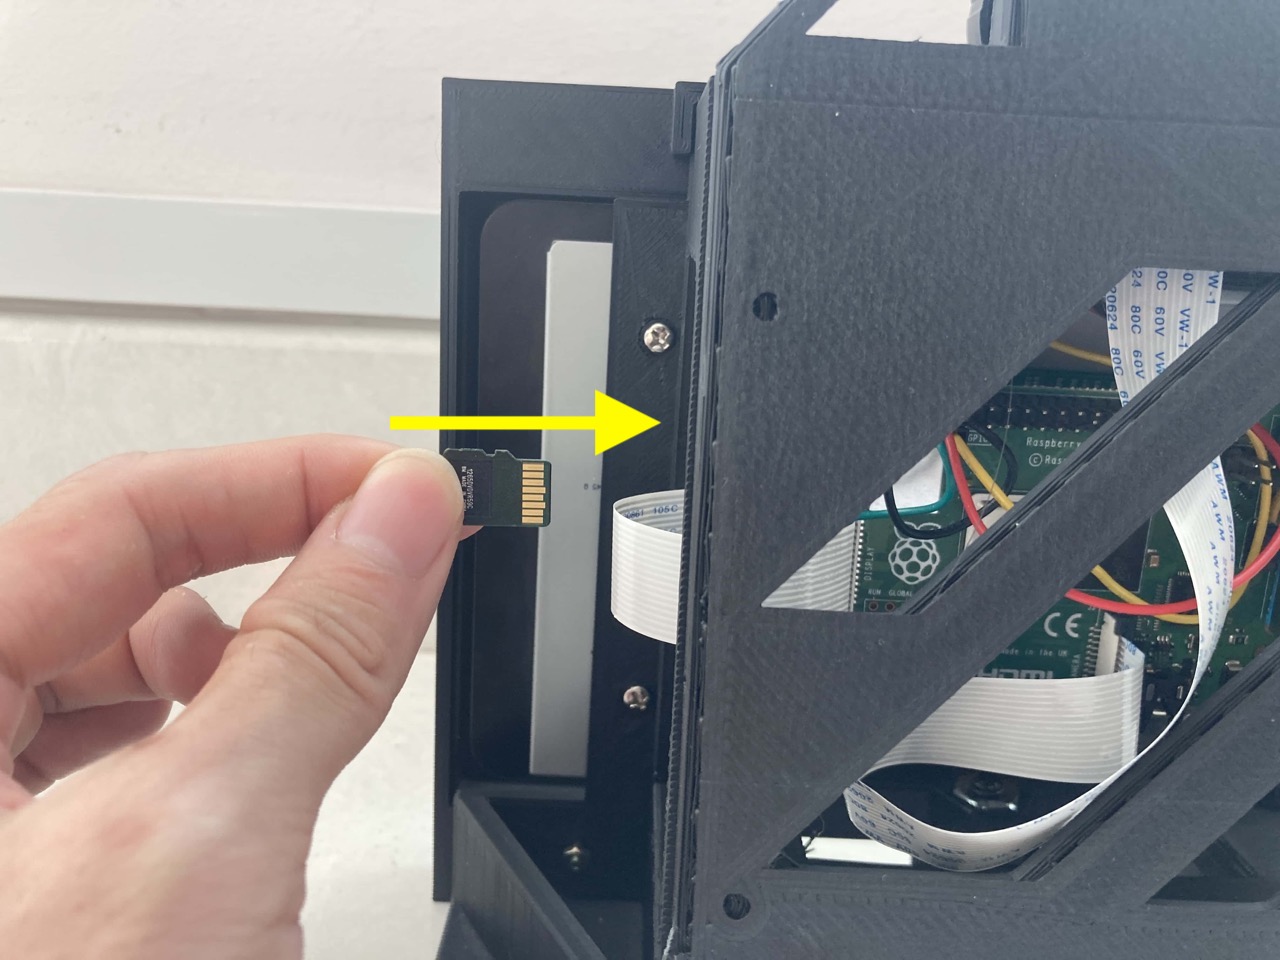
Once you have removed the micro SD card from your computer, you can insert it back onto the XIMI unit. Orientate the micro SD card like the image below and insert it gently into the micro SD card port on the XIMI unit.
Important!
Do not force the SD card into the port as it may cause damage. If you have trouble inserting the card into the port, check if the orientation is correct first.
Ensure it is properly inserted by pushing it when it enters the slot.
Testing The Update#
Plug the power back onto your XIMI unit after all the steps above. Your XIMI unit should boot up normally.
You can now enjoy using the latest features we have provided for you!